Making Minecraft Look Good
View this report online: https://ziqishi-hmd.github.io/cs184-final-project-website/
Abstract
For our final project in CS 184, we decided to write custom shaders for the game Minecraft. By using a popular mod for the game called Optifine we were able to create a "shader pack", which is a collection of GLSL vertex and fragment shaders that are used for rendering the game. By modifying these GLSL shaders, we were able to significantly alter the look of certain visual effects in the game, the most complex of which are dynamic shadow mapping and a more "realistic" water rendering system. Aside from those two big changes, we also added smaller things like a wind effect for tree & leaves and an option to turn on Cel shading.
Technical Approach
Optifine Overview
To understand how we implemented the following effects, it is good to first understand how the Optifine mod works. Optifine renders each frame by performing a series of render passes, 4 of which were modified for this project:
- Shadow Map: This is what gets run first, and as the name suggests, this is where Optifine renders the scene from the perspective of the sun and saves the data to a built in shadowmap that is accessible as a Uniform in subsequent stages.
- Gbuffers: This is where the actual terrain, entities, water, and all other meshes are rendered. In practice there are around 20 different gbuffers shaders for all different types of meshes, but the basic idea is that the input is mesh data and the output are pixels that are drawn to our colorbuffers (there are a total of 16 colorbuffers we can render to).
- Composite: This is the stage where we compose our multiple color buffers into one singular color buffer. We can have up to 16 distinct composition stages, but we only needed to use one for this project.
- Final: This is the final screen space pass where we take the final composed image and render it to the framebuffer. Post processing effects can be applied here.
Cel Shading
The Cel shader was the very first thing we implemented, and it is very simple. The effect works by only allowing pixel brightnesses at specific discrete values. So in the code we calculate the brightness of a pixel (the magnitude of the 3d vector representing its RGB color), then clamp it to some fraction k/n where n is the number of discrete brightness levels and k is chosen to give a fraction that most closely approximates the original brightness. Then, we simply set the brightness to that value. This gives the final output an almost "cartoonish" look, that works well for some games (like Borderland), but is probably not the best look for Minecraft which is already a heavily pixelated game. Still, this was a good practice run, and it helped us better understand the Optifine rendering pipeline. Here is how this effect looks:
Leaf Wind Effects
The next thing we implemented was a wind effect for the leaves of trees. Again, this was a relatively simple effect to implement. The way we did it is by modifying the vertex shader of the leaves to add a position and time dependent offset to the vertex position (technically, we modified the shader for all terrain blocks, but we used an if statement to run this code only for leaves). To quickly approximate a wind effect without running complex physics simulations, we used the sum of two offset sine waves at slightly different frequencies to add to each dimension of the position (giving us a total of 6 sine waves of different frequencies). Since that explanation might be a bit difficult to follow, here is the code that we use for this:

Despite the simple nature of this implementation, the final effect actually looks pretty good: (all while being very fast to calculate)
Shadow Mapping
This is where things start to get complicated. Shadow mapping is a rendering technique where the scene geometery is rendered from the perspective of a light source, and depth information about each pixel is stored in a depth buffer. Then, in the composition stage, we can add shadows as a screen-space effect by taking the screen-space position of the pixel and its depth, calculating that pixel's world-space position, then transforming that position to a shadow-space position. Finally, we can sample the shadow map at that position and check if the two depths match. If they do, then that pixel is exposed to the light, otherwise, it's blocked by some object. Much of the code to get this part of the implementation working was provided by the tutorial, along with code to approximate soft shadows by supersampling the shadow map and code to modify the effective "shadow space" of the image which allowed us to keep a higher resolution at areas near the player and use a smaller resolution the farther we get (this allows close up shadows to still look decent without using a MASSIVE shadowmap).
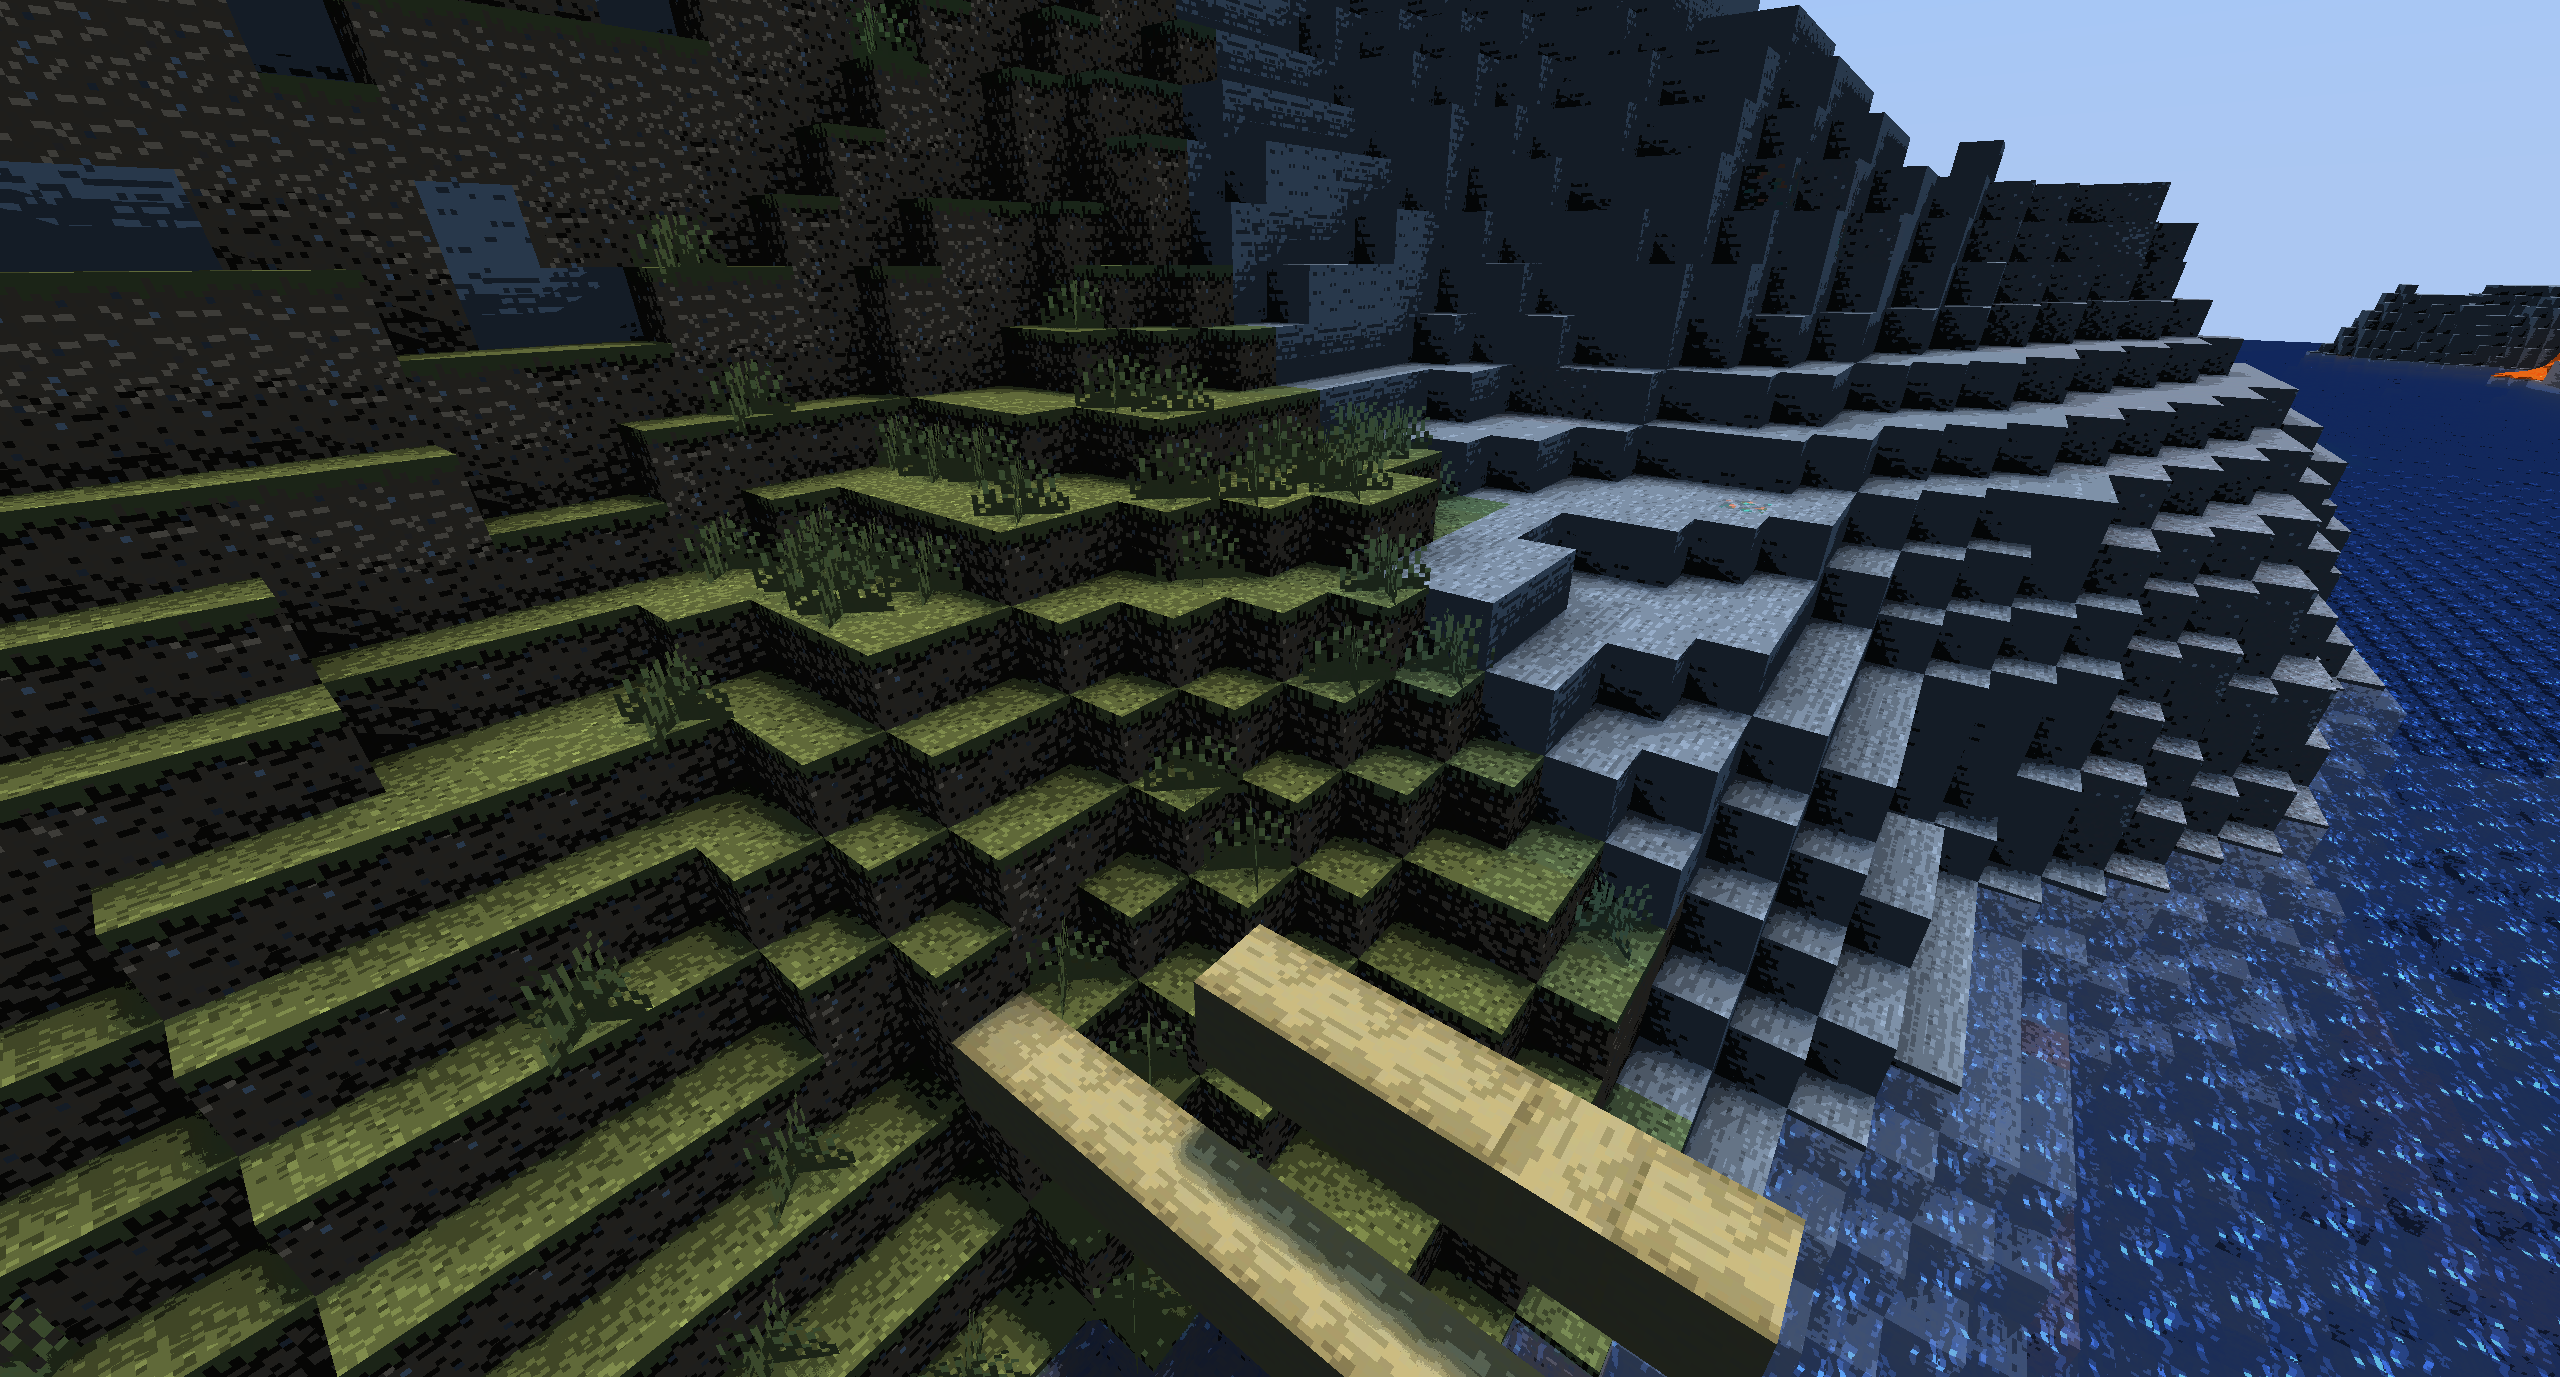
However, things got far more complicated when trying to get the code to be in a presentable state. While the tutorial was a great reference point, much of the provided code was buggy and it even had syntax errors and typos. Since we only get a simple "failed to compile" error when there is a syntax error, debugging those was very painful. However, even when we got the code running there were some major issues. Mostly notably, since the lighting effect was applied in the composition stage now (instead of in the terrain fragment shader as is default), the wrong lighting effects where being applied to the sky and the players hand:
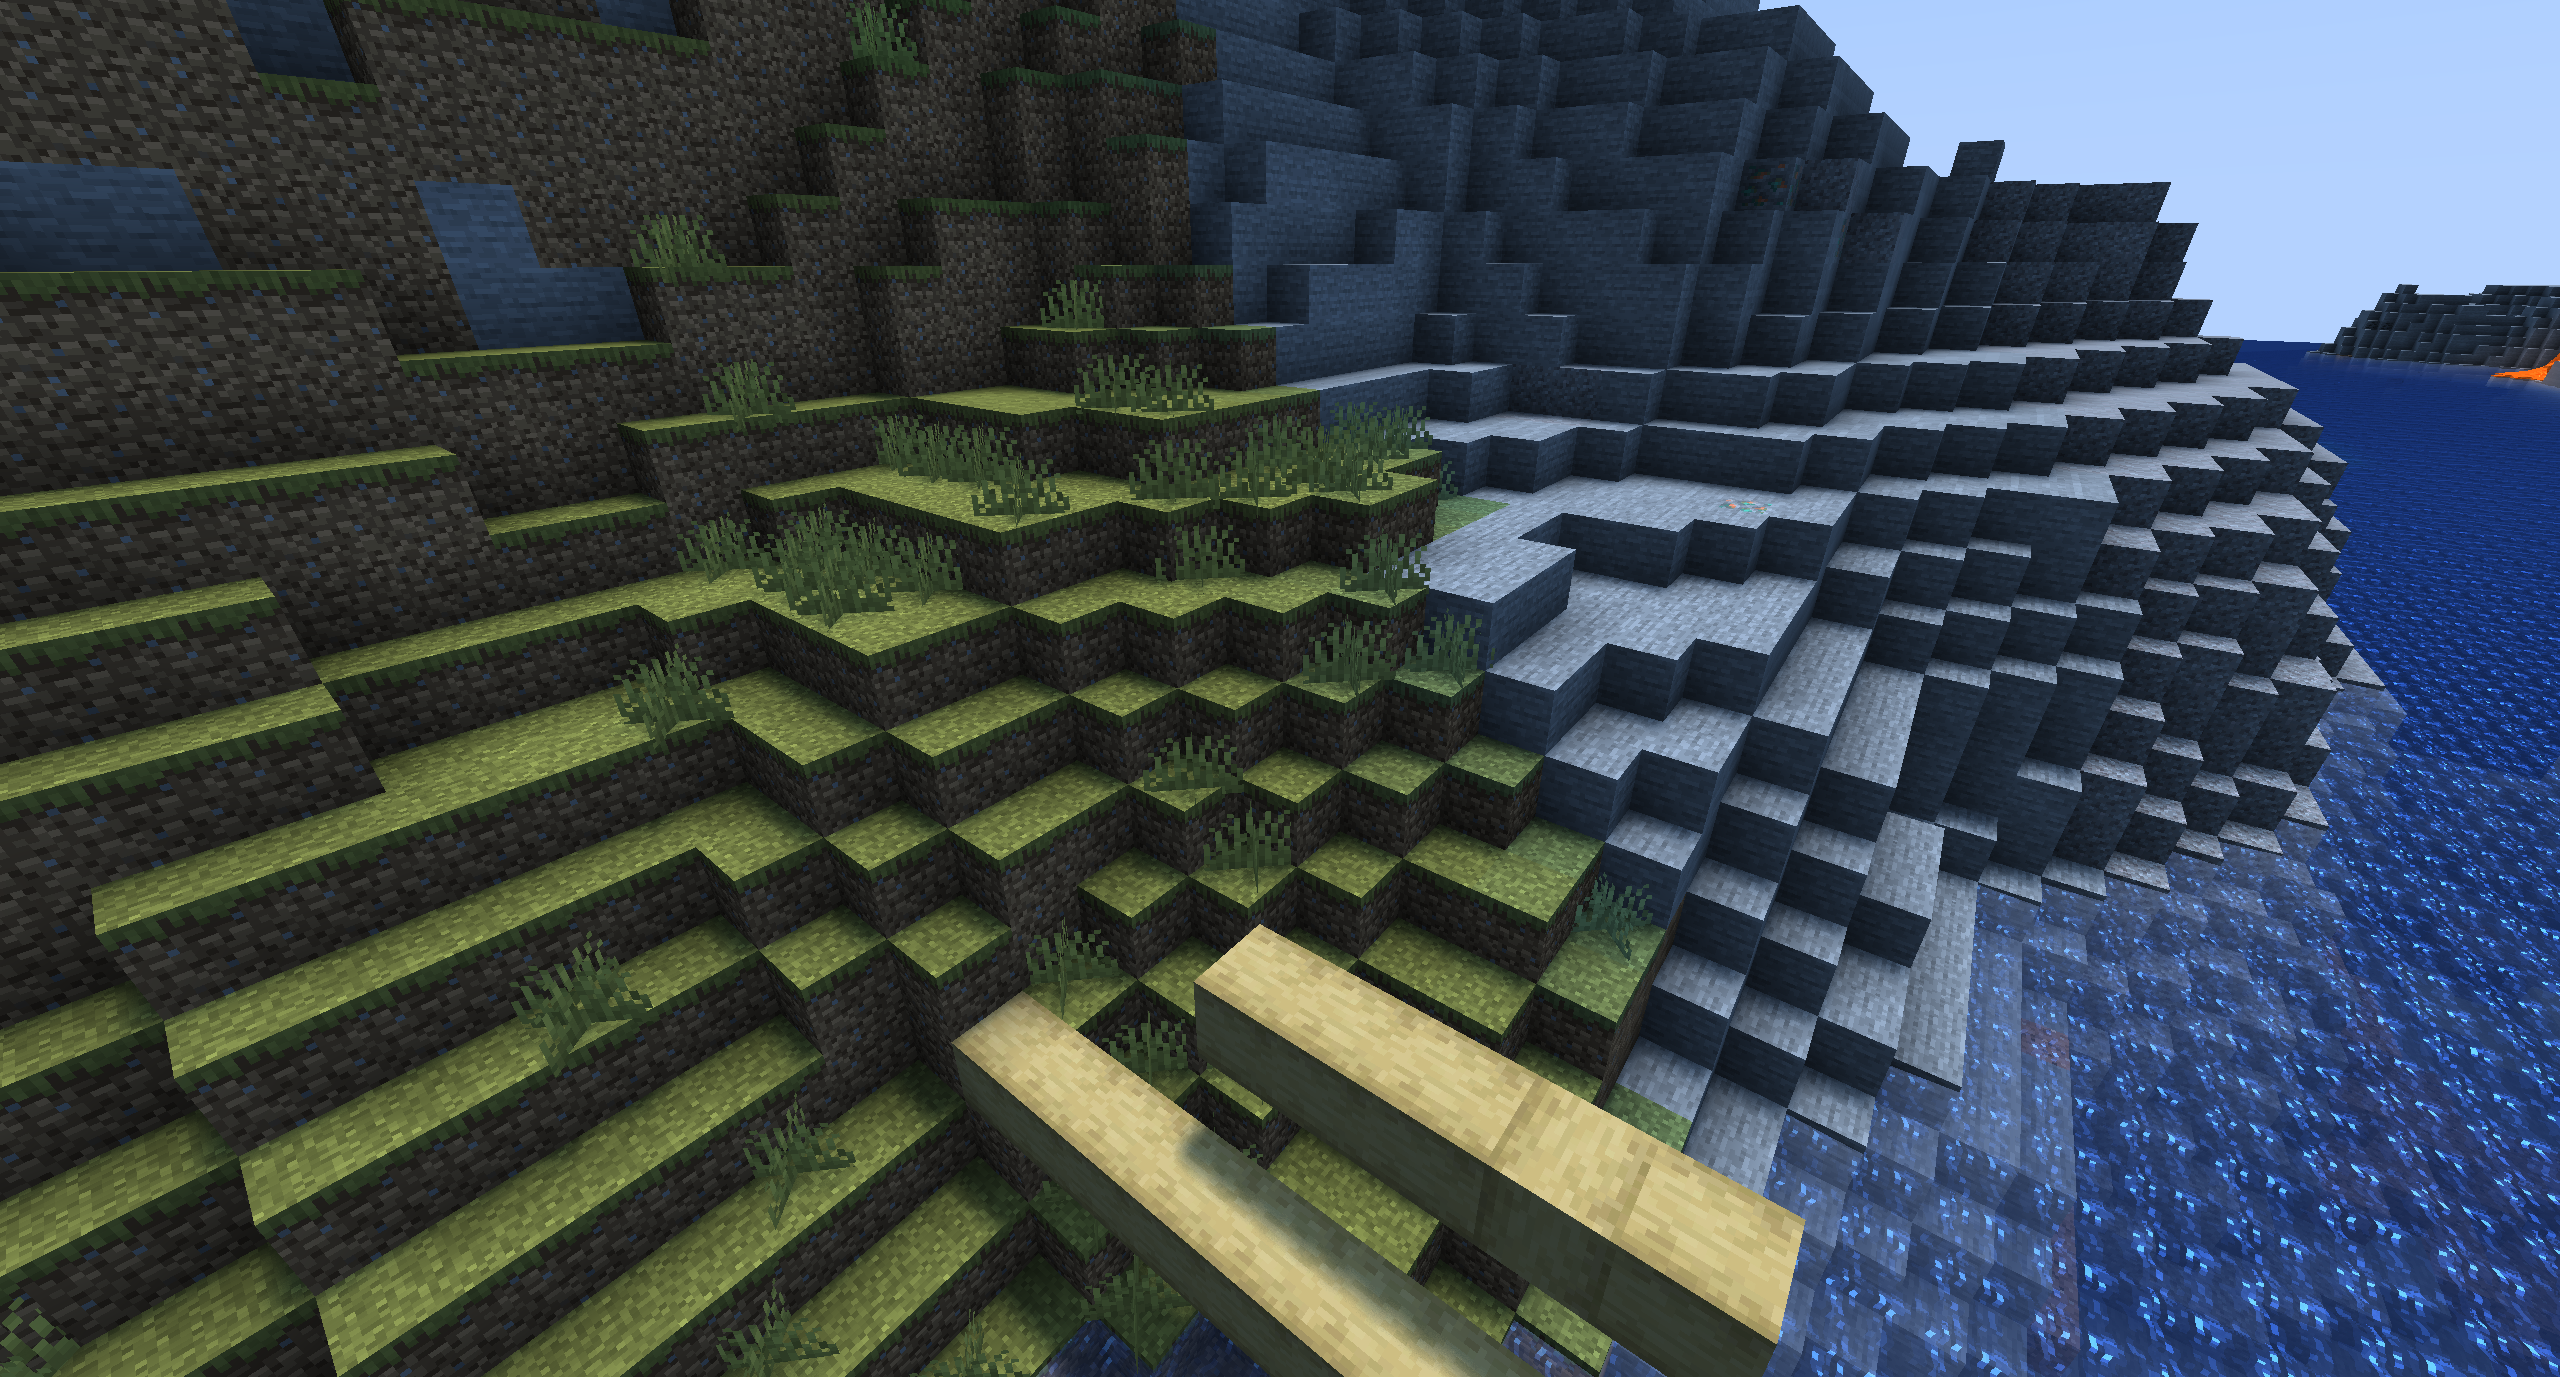
The tutorial mentioned that these bugs would be fixed in the "next part", which never got published, so we were on our own. Our first thought was to simply move all the lighting calculations to the terrain's fragment shader. This did work sort of okay for blocks, but it meant that the player's hand, the water, all entities, and other non-terrain objects were basically not affected by shadows. This looked very bad, so we needed to figure out a way to get the effect working in the composition stage. After much time debugging, we figured out that by adding extra lines of code to all the other gbuffer fragment shaders we could write proper lighting metadata to a color attachment we used for the terrain and it would apply the proper lighting for all other objects in the scene in screen space. We assume this was the solution the tutorial was referencing, but we had to figure it out for ourselves. After we did that, we got a decent looking first attempt at a shadow that looked like this:
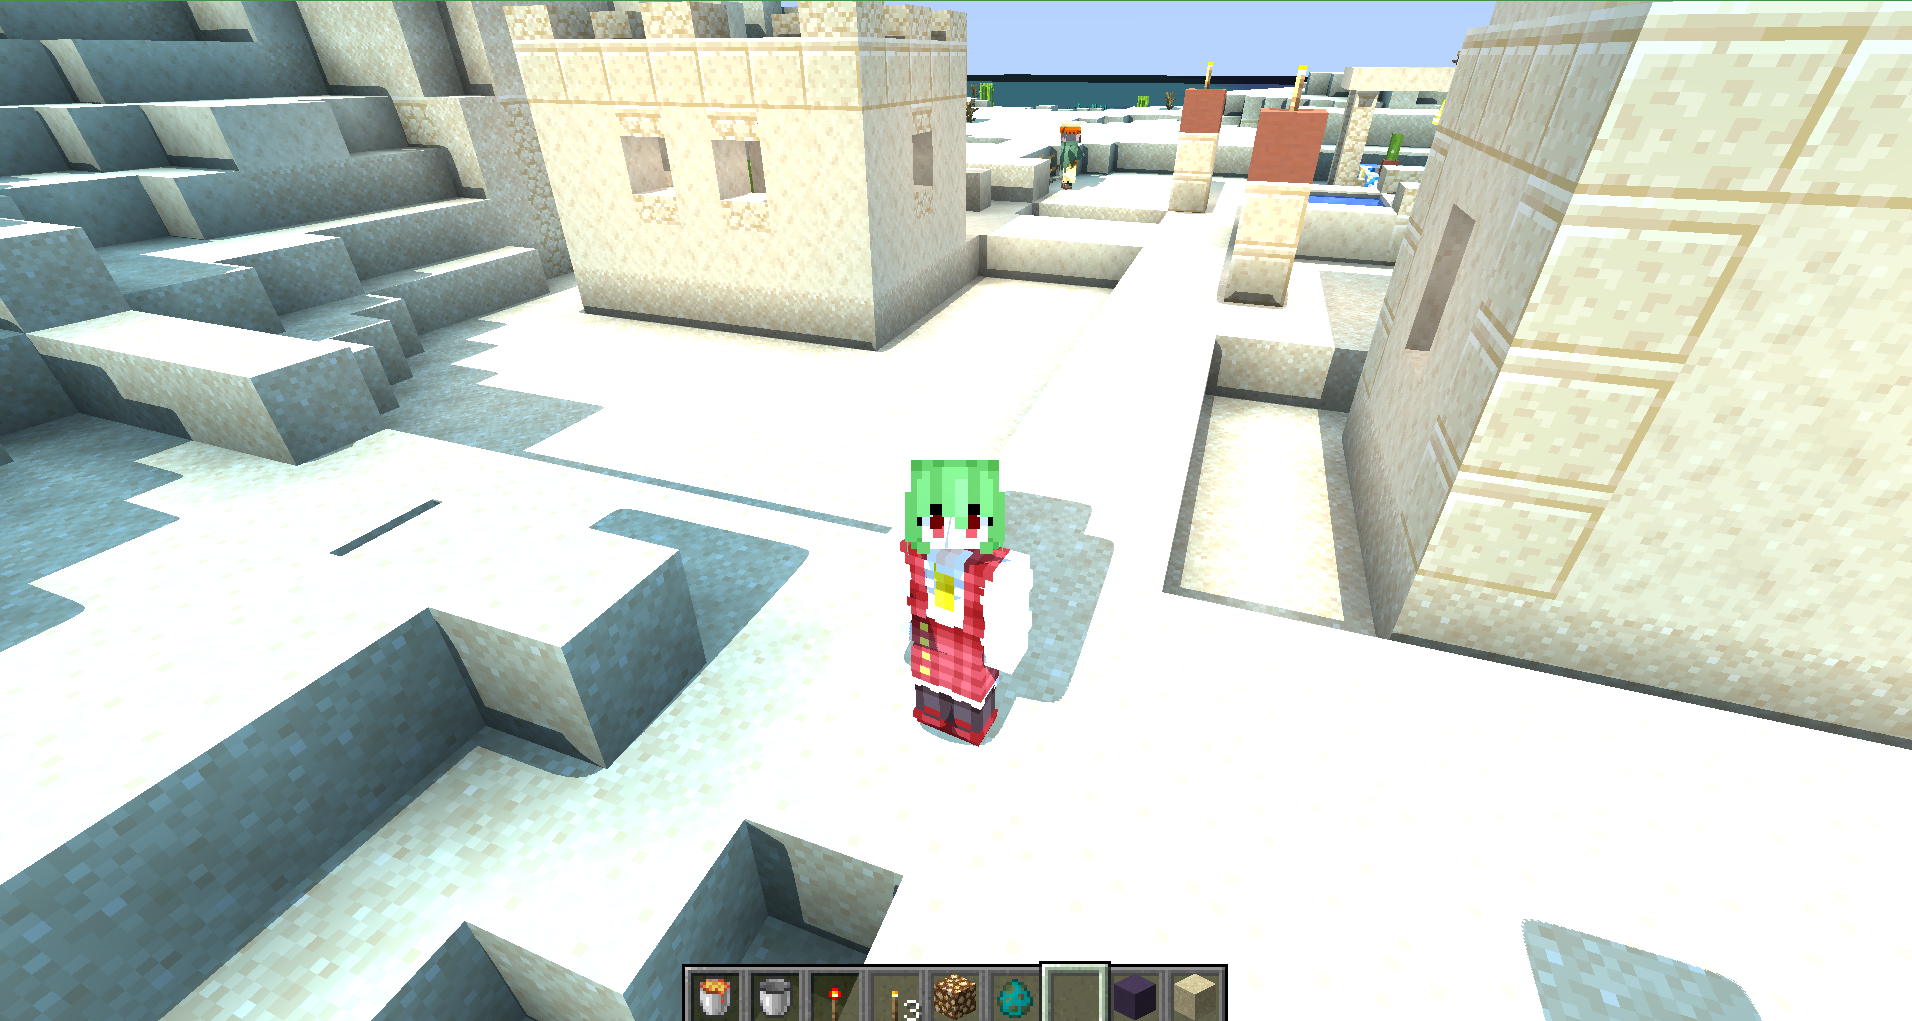
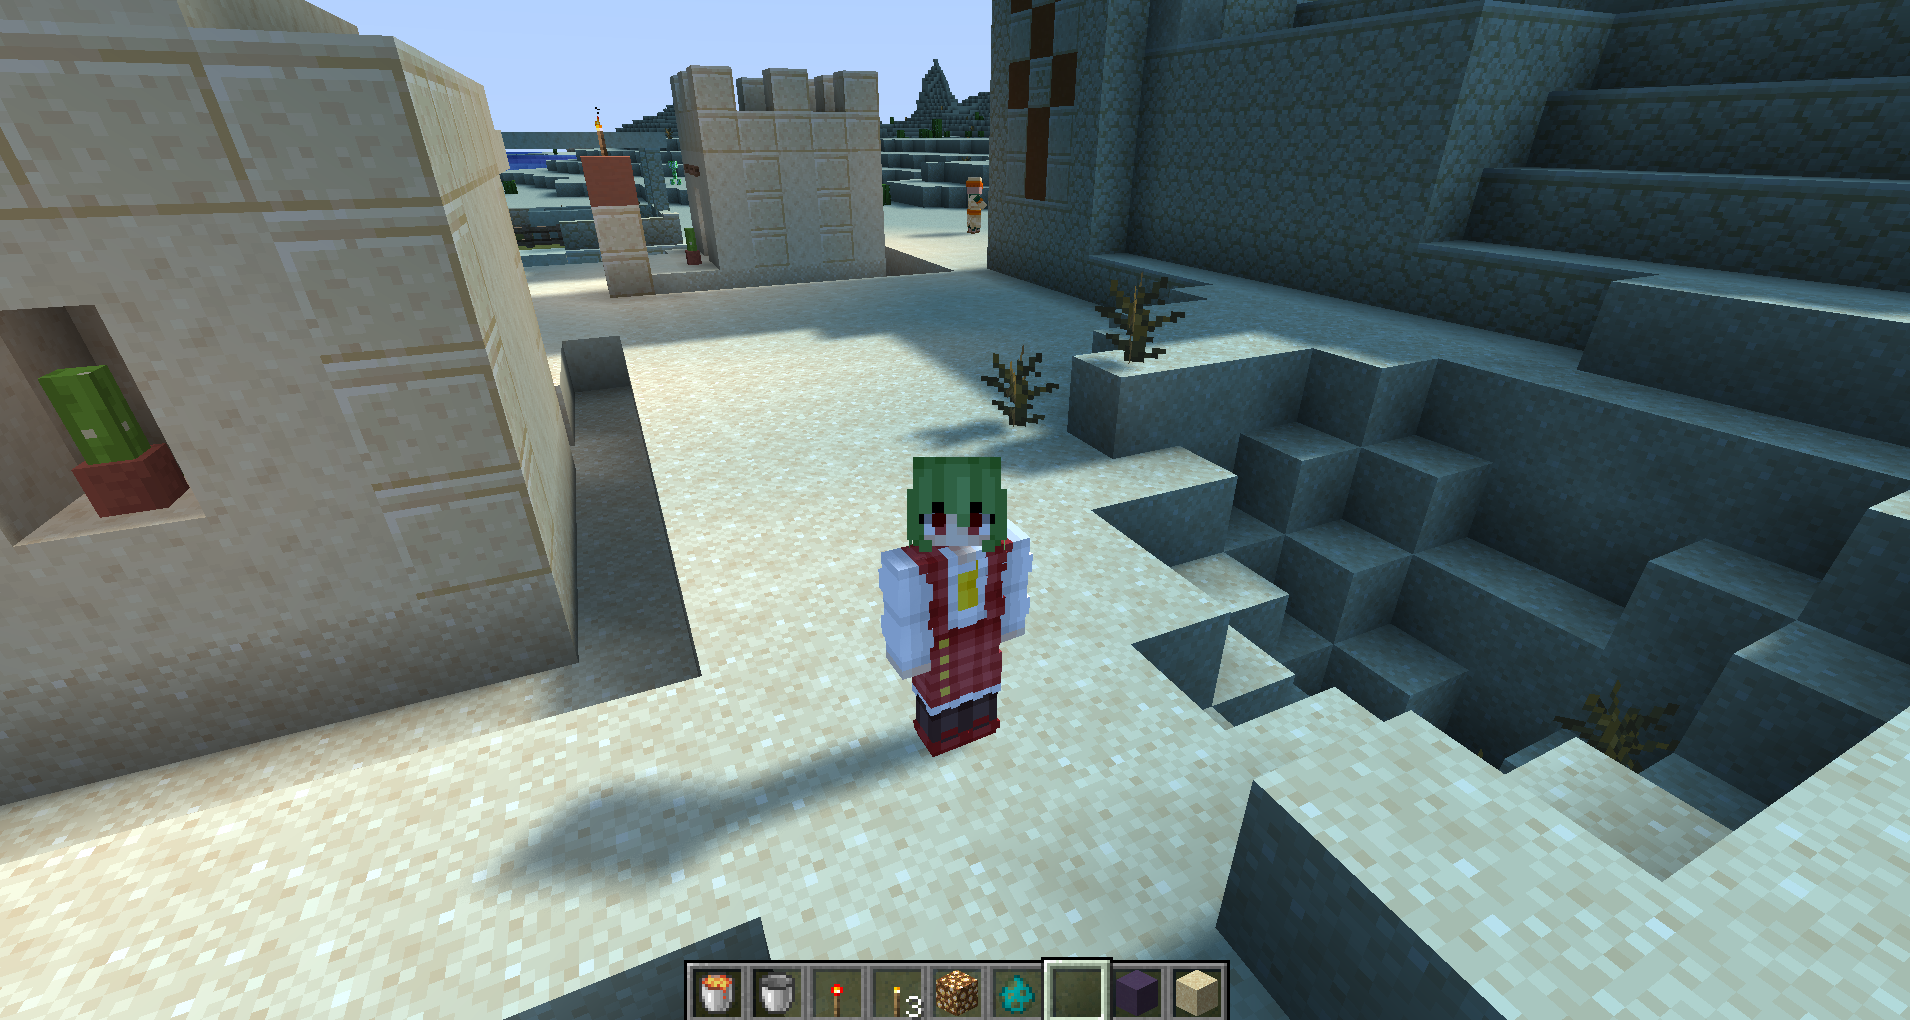
The hard edges of the shadow were later fixed by using the supersampling mentioned above, however, the big issue with this image was that the sand texture was being washed out by "too much light". To fix this issue, we had to go into the composition shader and apply a function to the pixel brightness to reduce how often a pixel exceeds the dynamic range of the screen. After a lot of fiddling, we ended up using the function brightness = min(brightness, 3.0)*0.75, since it seemed to give the best results (subjectively). Here is what that looks like:
Fancy Water
The final part of our project was to implement a shader to improve the look of water in Minecraft. For reference, here is what water looks like by default in minecraft:
First of all, the color of the water is extremely strong, even at very shallow places. Also, while the opacity of the water is dependent on depth, it is only dependent on the depth of that block relative to the surface, and not relative to the total distance that light has to travel through the water to get to the player. We sought to fix both of these issues.
We started by adding some life to the water by getting it to move like the leaves. The result of this initial code looked like this:
This was a good start, but the water still looked very boring, so the next thing we worked on was implementing a better "depth based" opacity than the original implementation. After some experimentation, we settled on what we think is a pretty elegant approach. For each pixel on the screen, we sample the depth of the current pixel, and the depth of the current pixel in a depth map that only includes opaque blocks (no water). Then, we translate both depths at that screen-space coordinate to worldspace, and finally calculate the distance between the two. Then, we use a decaying exponential function with the distance as the exponent to simulate the exponential decay of how much light reaches the eye after passing through some volume of water. Using this basic method, we were able to create a water depth effect that takes into account how much total water the light passed through to get to the player's camera, and not just the depth of the water. After implementing this, we got water that looks like this:
After we got that working, we moved to improving the look of the water texture. Currently, the applied water texture adds a very strong blue tint to everything inside the water. In real life, the tint that water applies is very subtle when the water is shallow. To simulate this, we simply divided the opacity of the water by 4, which seemed to give a good result. Furthermore, we applied an approximation of specular lighting to the water by raising the color value of the "shimmer" texture to 3, which made the small shimmers far more apparent. The effect of these changes looked like this:
Finally, to add another layer of detail to our water rendering, we decided to implement one final effect that added a time dependent offset to the texture coordinate that we sample from to create the effect of tiny ripples on the surface of the water. This ended up being more complicated than we thought because it seems that the textures for everything in minecraft are stored in one massive 2D texture map, meaning that by adding offsets to the texture coord we were sampling from other textures. After many tribulations, we figured out that we needed to take the modulus base 1/64 of our offset before applying it, which fixed this wrapping issue. With that fixed, we finished our water implementation!! The final result looks like this:
Conclusion
Overall, we are very happy with what we were able to create. There are definitely still a few minor issues (such as numerical errors when calculating the water texture offsets) which are mostly due to some limitations with the Optifine rendering engine, but for the most part we think our shaders give a more "realistic" look to the game that adds appealing visual effects without straying from the game's inherent blocky aesthetic. If you want to try out our shaders for yourself, here is the repo: https://github.com/sharhar/CS184Shaders
Contributions
- Shahar Sandhaus: Made the initial cel shader and wind implementations. Polished the shadow mapping implementation a bit, and wrote most of the water effects. Wrote the HTML and CSS website template we used for the final project and milestone.
- Duan Lyu: Did some organizational work at the beginning to get everyone on the same page. Went through the entire diffuse shading+lightmap+shadow tutorial, implemented the code and debugged it, and worked with the rest of the group to improve its effects. Also worked on the slides for the milestone+final presentation, and the final website.
- Ziqi Shi: Gathered the community resources we needed for the project, and then followed through the light and shadow mapping part of the lighting implementation. Polished the wind effects. Logistically, Worked on the milestone and final presentation, narrated the milestone video, and also wrote the milestone website.
- Vincent Lee: Helped debugging the wind effects and the many lighting bugs we encountered. Went through existent shader packs to figure out how to setup toggles in options menu and to find other implementations of shadow mapping and watter effects. Recorded milestone video, and contributed to the project website and slideshow.